Showing posts with label Home Decor. Show all posts

Friday, November 8, 2013

Python Contact Paper Make-overs!

When I was pregnant everyone told me "You don't even know how much this baby will change your life!"  You know when you hear something over and over again but don't understand it until it happens to you?  Um yeah....now I fully understand!

Having a baby is amazing.  Yes my life has completely changed.  There is nothing quite like being a mom and I love it.  I'm in the changing diapers, feeding, and sleeping cycle.....over and over again.  Maybe doing the dishes here and there haha.

I'm a huge HGTV fan.  House Hunters, Property Brothers love love love.  In the wee hours of the morning (trying to get Jax back to sleep) I discovered The High-Low Project.  Um how have I never seen this before?!  I LOVE it.  It is now a recorded series on my DVR and I've seen more episodes than I can count.

Why I like it so much?  It shows you how to find high end looks on a low budget and if you can't find what your looking for, DIY.

Last night I watched an episode with a great idea that I hadn't thought about.

Sabrina Soto found a luxurious high-end python dresser that looked a lot like this:
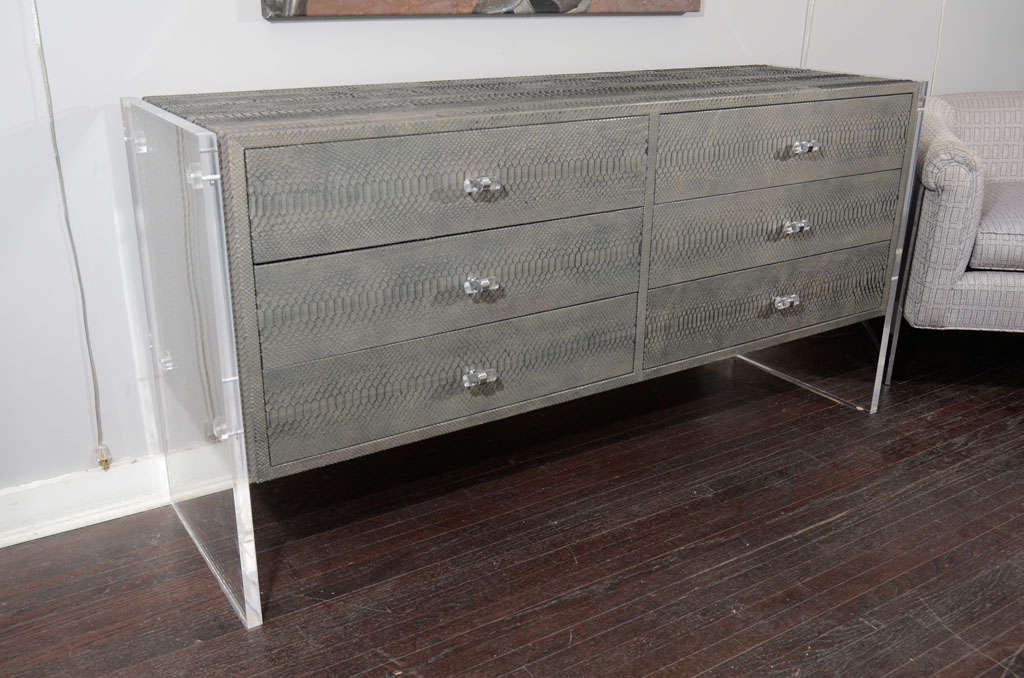
I found this dresser at http://www.1stdibs.com/

It was around $10,000 and the budget she received for her client's entire room was $5,500.  So obviously this called for a DIY.  Her associate(I forget his name but he is reeeeeally good) ordered an unfinished dresser online, and PYTHON CONTACT PAPER. Yes contact paper!  Who knew?
Something so easy I never thought of.  It ended costing around $300.  Honestly if you took an old dresser and sanded it down the cost would be even less.

I've searched and searched on the internet and python contact paper is hard to find.  Designyourwall.com  had some animal print contact paper around $90 for a 32 foot roll.  That may be a little expensive for some, so I found some bloggers that can help you in your search...


Monday, August 5, 2013

10 baby nursery favorites

Since little Jaxon is arriving in October.....it's getting down to crunch time.  After looking at a million and a 1/2 nurseries, these are my top favs.  I LOVE the modern nursery style with the big and bold patterns.

I will also give a shout out to paint.  It's amazing what a fresh coat of paint or a simple accent wall can do especially if your money pocket is a wee bit tight.


Monday, July 8, 2013

Accent Wall

I decided I am not only obsessed with the chevron pattern, but painting any type of pattern on walls.  Painting is so addicting!  Luckily for my husband, this was the last room in the house that needed to be painted.  Until next year.  He made me swear 12 month pledge before I re-demolished everything again.

The dining room needed some umph.  The previous owner put up what we loving called the "Thanksgiving wallpaper".  Um.....yeah.

I wanted our dining room to be chic and beautiful, and with colors that also tied into our living room.


Supplies needed: 

Black sponge brushes
Blue tape (I feel like the "sharp edge" blue tape from scotch works the best...)
A white pencil (shows up easily, erases great, and doesn't show through paint)
A yard stick/level
An accent paint of your choice

                    Step one:


                    Step 2:


                 Step 3:


I used Word and inserted the diamond shape.  Easy peasy. Printed it on card stock.

Every other line, mark 20in down from the ceiling. On the other lines, mark 6in down from the ceiling.

At the 20in and 6in marks, place the tip of the diamond along the line and trace.
Erase the line in the middle


                 Step 4:


Paint three coats (then clear top coat if needed) let dry and peel.

TIPS 

If you are going metallic, Martha Stewarts selection is awesome.  I used 4 of her little bottles.  I also got a interior top coat to ensure it stays on the wall well

A lot of people get flat paint for the wall, and then satin paint of the same color for the accent.  Perfect if you are going for a more subtle pattern.

My friend wanted thin lines, so she substituted paint with a non-oil based paint Sharpie.  It looks awesome.


 After it's dry, take off tape, touch up it up, erase any extra lines and you are set!


Spooning since 2012

I found this cute idea on Pinterest and LOVED it.  I needed a little something to spice up our kitchen, so this was perfect.  Great when you have limited kitchen wall space.


All that's needed is a picture frame, 2 spoons, and a piece of scrapbook paper.  I just printed off the words from my computer. Easiest project I've ever done and everyone who reads it laughs:)
I think it's a great Anniversary, Valentine's, or Wedding gift.

Here's the link to another example:   http://www.hometalk.com/907521/anniversary-wedding-or-valentine-s-day-art-project 

Sunday, February 24, 2013

Chevron Wall Tutorial

I am obsessed with the chevron pattern...which is okay because it seems the rest of the DIY-er population is too. My latest adventure was painting the spare bedroom.....which one day will be our kiddies room. I read so many DIY blogs and watched on painting a perfect chevron on my wall. Oh my goodness. All of the blogs/tutorials recommend drawing a grid on your wall. I realized if I wanted to spend the rest of my life painting one wall then I should follow their advice. So I created my own perfect chevron plan.

It's been thought of before and certainly isn't rocket science, but it made my life so much easier! I created a template for one chevron:
Um yeah.....it's out of my random pile of scrapbook paper.


Here are the measurements:
7 in high
9 in long
up 3 in from the bottom


I started by marking down every 7 inches on one side of the wall with a 12 inch ruler then I traced my template on the wall with a pencil.

I would also measure the wall after I traced it just to make sure it was aligned right

Ta Da!  I love my Chevron wall!