Friday, November 8, 2013

Python Contact Paper Make-overs!

When I was pregnant everyone told me "You don't even know how much this baby will change your life!"  You know when you hear something over and over again but don't understand it until it happens to you?  Um yeah....now I fully understand!

Having a baby is amazing.  Yes my life has completely changed.  There is nothing quite like being a mom and I love it.  I'm in the changing diapers, feeding, and sleeping cycle.....over and over again.  Maybe doing the dishes here and there haha.

I'm a huge HGTV fan.  House Hunters, Property Brothers love love love.  In the wee hours of the morning (trying to get Jax back to sleep) I discovered The High-Low Project.  Um how have I never seen this before?!  I LOVE it.  It is now a recorded series on my DVR and I've seen more episodes than I can count.

Why I like it so much?  It shows you how to find high end looks on a low budget and if you can't find what your looking for, DIY.

Last night I watched an episode with a great idea that I hadn't thought about.

Sabrina Soto found a luxurious high-end python dresser that looked a lot like this:
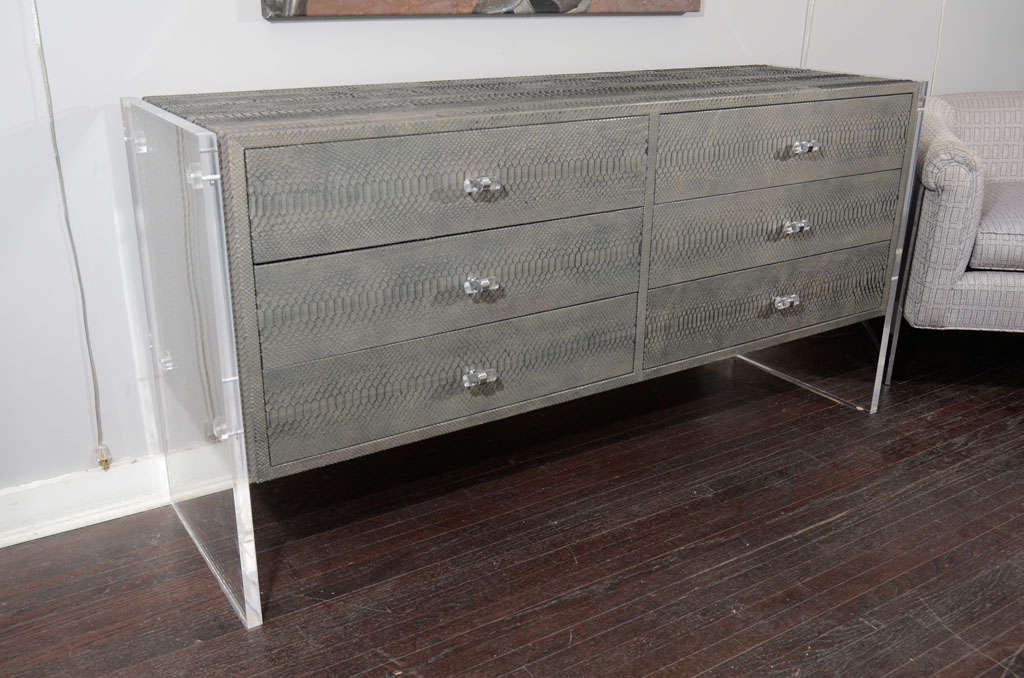
I found this dresser at http://www.1stdibs.com/

It was around $10,000 and the budget she received for her client's entire room was $5,500.  So obviously this called for a DIY.  Her associate(I forget his name but he is reeeeeally good) ordered an unfinished dresser online, and PYTHON CONTACT PAPER. Yes contact paper!  Who knew?
Something so easy I never thought of.  It ended costing around $300.  Honestly if you took an old dresser and sanded it down the cost would be even less.

I've searched and searched on the internet and python contact paper is hard to find.  Designyourwall.com  had some animal print contact paper around $90 for a 32 foot roll.  That may be a little expensive for some, so I found some bloggers that can help you in your search...


Thursday, October 24, 2013

My Newborn Baby Pictures!

Meet Jaxon Adam Gardiner!!!!  Born October 7th at 2:58 pm, 7lbs 15oz, 20 inches long.  He is our little angel!  So excited that he's finally here.  Of course one of the things I was looking forward to was our newborn photo shoot.  Ah!  So in love.  These are a few of my favorite shots.  

If you live in the Northern Utah area, Amy Shaw is an AMAZING photographer.  I highly recommend her:) Her website is sheffieldshawphotography.com. You should check it out....she has great ideas and really good pricing.


Friday, September 20, 2013

{Wreath of the Month} This is Halloween!

I pretty sure I just joined the "Halloween's my favorite holiday" club.  Maybe it's because this is my first Halloween decorating my own house.  And I've been going crazy with the decorations! And Nightmare Before Christmas is constantly playing in my head.  My husband came home yesterday to a chaotic mess of black and orange on our kitchen table.  Should I be doing the dishes?  Probably. But crafting is so much more fun.

I love wreaths, as I suppose any Pinterest-loving crafter does, so this is my first stab at my "Wreath of the Month."  Every last Thursday (or so) of the month, I will be posting a DIY wreath.  Ta da!  I'm so excited.  So for those of you, like me who get sick of decorations fast, can at least enjoy a flare of change at least once a month.

First off, if you haven't gone to JoAnn's in a while.....NOW IS THE TIME.  Best deals right before Halloween, especially for fabic.  And also Target's "Spot on the Dot" has great $1-$3 Halloween decor.

Everything I bought for the wreath I found at JoAnn's.  I'm a fan of anything big and sparkly, hence the boa.

With one yard of the Tulle and 2 yards of the orange netting, my total came to  $15.75.  Not bad!

I prefer my strips to be chunky, then I layered them for more volume

Most people use pipe cleaners to tie the fabric to the wire frame.  I just used black yarn that I found lying around the house.   A little more time consuming but saved me a couple of bucks :)

I did the orange first, and then implemented the black into the wreath.

I used a hot glue gun and glued the boa to the netting.  This gave me some control over the crazy black feathers.


I saved extra ribbon to hang the wreath.  And here's the finished product:


As I said before...I LOVE Halloween!
Check out my blog next time for my Thanksgiving wreath.